How to Draw Massage Strokes
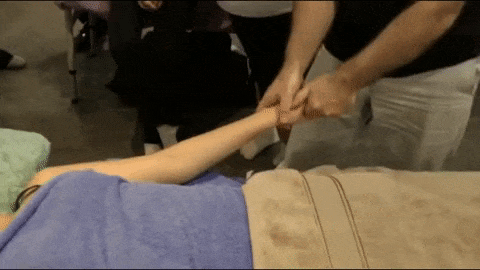
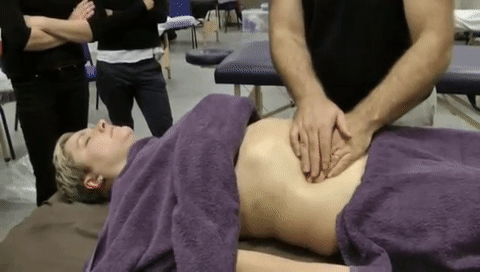
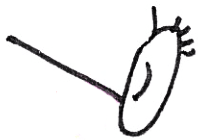
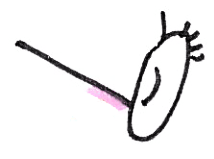
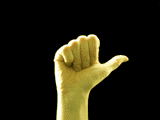
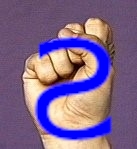
Would you like to learn how to draw a massage stroke in a few seconds? Here are two examples:
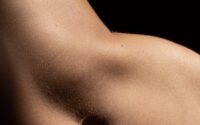
| Massage Stroke Video | Stroke Drawing |
|---|---|
 |  |
 |  |
If you learn this Tomek’s notation (the author is a Czech LMT), you can very easily draw a massage stroke in a few seconds and perform it later according to the drawing. The system is very simple and has many advantages. In this article you will find instructions on how to note down the massage strokes this way. (Stroke videos: courtesy of Bodyology School of Massage.)
Advantages of Massage Strokes Drawings
- You don’t have to be an artist: anyone can draw it, even children!
- Simplicity and speed: to make an unambiguous and detailed drawing is not the goal. On the contrary, we want to quickly and simply draw a massage stroke picture in a few seconds so that we can easily recall it later.
- Easy to read: The massage movement drawing is super simple and readily understandable. During a practice massage, the massage strokes can be performed just by quickly looking at the drawings. Looking at the „prompt“ does not delay the massage.
- Minimal equipment: all you need is a sheet of paper and a pencil.
- Colors are not necessary: more colors can be useful for better clarity, but the drawing is easy to understand even being black and white.
- Minimalism: draw only what is absolutely necessary. Drawing something extra is considered a mistake that takes unnecessary time.
- Memory: for some, just drawing the massage strokes will help to remember the massage movements better.
- Extensibility: while this is standardized system, one can come up with one’s own small modifications, improve the system or fit it according to what is needed.
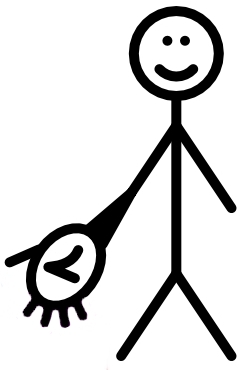
- Ready for publishing: for publication purposes, the same drawings can be created in a graphics program (preferably a vector program such as Photoshop Illustrator or Affinity Designer). Here is an example:
| Massage Stroke Video | Stroke Drawing |
|---|---|
 |  |
What Are the Benefits of Massage Strokes Drawing?
Massage students often deal with the following problems:
- How to remember massage strokes?
- Is it possible to draw massage strokes somehow?
- How to memorize the progression of strokes (which will be demonstrated during the exam)?
- How to prepare a „prompt“ according to which massage strokes can be practiced at home (on relatives, friends, etc.)?
Advantages and disadvantages of various solutions to these problems:
- Written description of a stroke: to write down a description is lengthy, it is difficult to do while learning strokes during a course, and writing takes too much time. It is quite difficult or almost impossible to perform a stroke according to a written description (your own or from a textbook), the description may be incomprehensible after some time, and reading from paper delays the practice massage.
- Photo of a stroke with added arrows: a hybrid approach that turns out to be not very functional in practice. Students do not prepare a photo with arrows on their own, such a photo is rather to be found in a textbook. The preparation of such photos is quite demanding (using a graphics program) and even lecturers do not always want to put them together. When they are available, these photos are often unclear to the students, and they cannot reproduce the strokes without a teacher. On the other hand, photos with arrows can be successfully used during a practice massage exercise as a prompt, but it would have to be very well prepared by the lecturer (students usually do not prepare such photos on their own).
- Stroke video: much better solution for teaching and home review – the student perceives different details, can watch the video repeatedly, better understands how the stroke should look like. However, not every massage school has usable videos available. When practicing massage at home, it can be a problem that the video also contains the lecturer’s comments. So when the student tries to massage according to the video, the video actually delays the massage, or some parts of the video have to be repeatedly skipped. The solution would be to have a video without comments, just with a massage strokes progression. However, in such a case, the student may have another problem: during practice massage, he does not have time to massage according to the video (which serves as a „prompt“). Video can also take the form of an animated gif (as you can see on this page), which has interesting advantages when combined with drawing.
- Stroke drawing: some students try to draw massage strokes during a course, but they don’t know how to do it. Their drawing is perhaps so simple that it is later incomprehensible. It can also be unreadable. On the other hand, someone else struggles to draw accurately and unambiguously, which turns out to be too complicated and slow, and the student gives up drawing.
Experienced massage therapists are in different situation. They have memorized a large library of message strokes, from which they combine the massage. They can also think in somewhat „abstract“ way – based on anatomy and palpation they can come up with original strokes or an individual approach. Yet even for these massage therapists it could be useful to know:
- how to take notes, e.g. draw a new interesting massage movement they have learnt.
How to Draw Massage Strokes
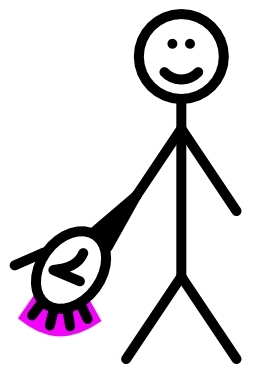
Which colors to use?
Let’s first show some simple examples to see what the drawing consists of:
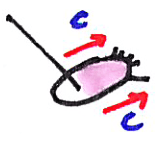
| |
- black color: client’s body (or body part)
- blue color: massage therapist’s hand shape, stroke type, all other notes
- red color: stroke direction
- pink color (highlighter): massaged area
Important is though we don’t have to use any colors at all. Simply a pencil (or a pen or marker) is enough and the picture is still clear:
|  |
We could also use e.g. just a pencil and a highlighter or other combination of colors at hand. The standard notation also uses green:
 | 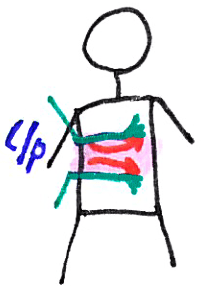 |
- green color: massage therapist’s hands or body, trigger points and other special features
The Drawing Process Step by Step
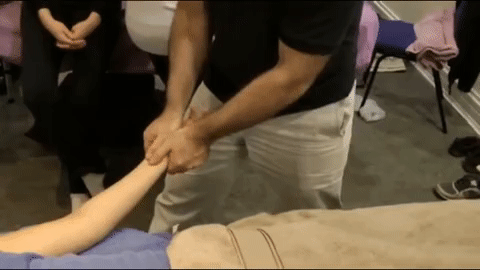
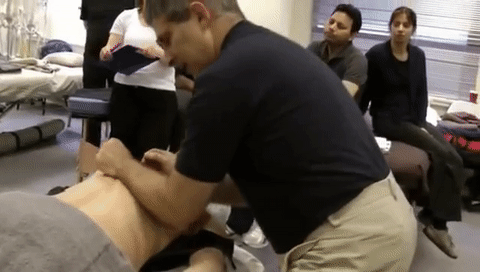
Suppose we want to draw the following massage strokes:
| Massage Stroke Video | Notes |
|---|---|
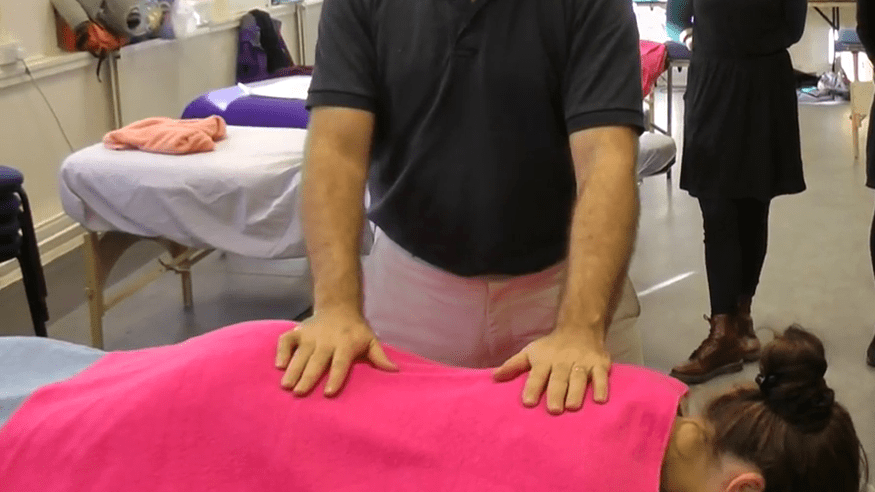 | Relaxing hold to have a pleasant introduction. Therapist and client get used to the touch and contact. |
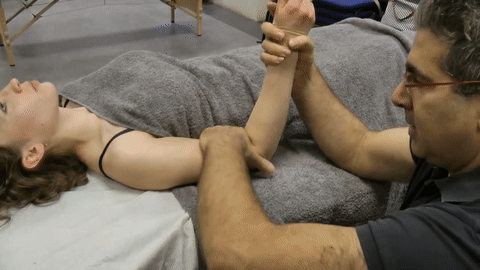
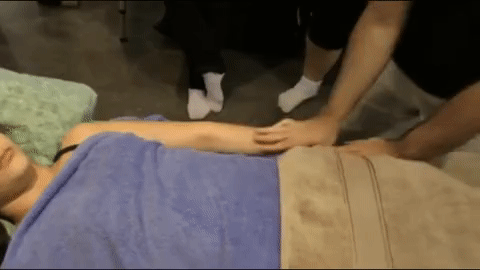 | Upper limb – extensors, triceps, deltoid. |
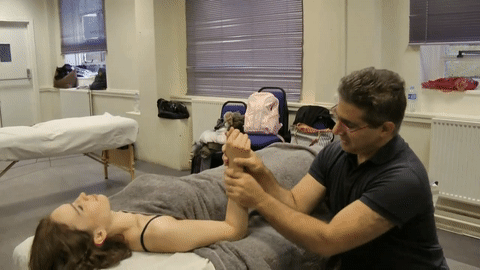
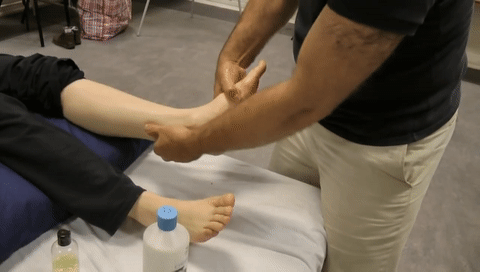 | Deep gliding of the Achilles tendon. |
 | „Finger milking“. |
 | Following the large intestine. It can help digestion. |
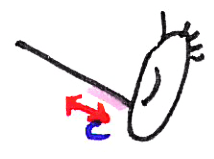
 | Petrissage and passive stretching.. Note the rotation of the head. |
Now the process of drawing step by step follows.
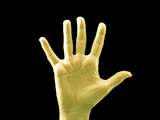
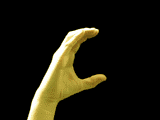
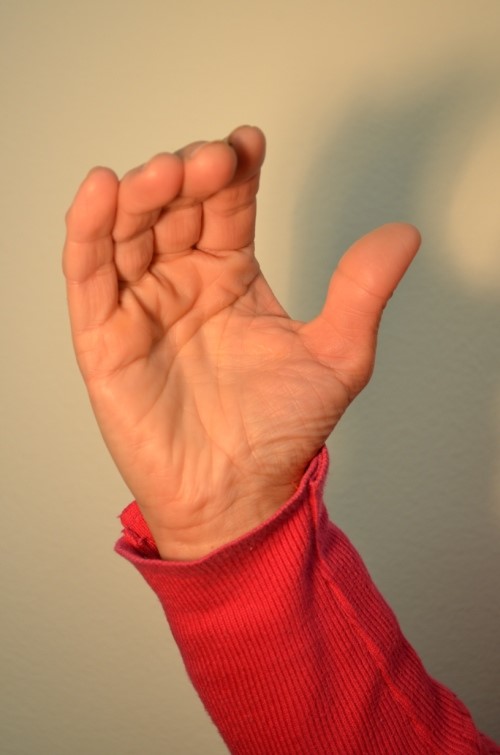
1) Draw the Client’s Body (or a Body Part)
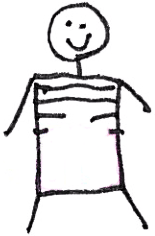
If you have more colors, you can use a dark color. The standard is black. If you have no black, e.g. blue will also work. Sketch the client’s body or a body part. Draw from the massage therapist’s point of view.
- WARNING: only draw what is absolutely necessary! For example, if you are drawing the body as a whole, and you want to draw a back massage, do not draw fingers or feet! The simpler the drawing is, the better.
Examples:
| Client’s Body Drawing | Description |
|---|---|
 | Body in a prone position (no eyes or mouth on the face). |
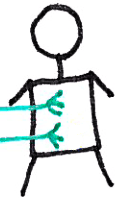
 | Body in a supine position (There are eyes and mouth on the face. Do not draw a nose, it is unnecessary!) We’re going to massage the upper limb, we’ve drawn in a simple way the arm and forearm (brachium and antebrachium). |
 | Foot massage. Do not draw the whole body, we don’t need it. |
 | Hand massage. From the palm lines and the fingers we can understand its position. The forearm widens, indicating that it’s not lying on the massage table, but is raised upwards (elbow flexion). |
 | Body in a supine position. We’ll massage the abdominal region. We want to note down the position of the stroke in relation to the ribs, so we’ve drawn also the ribs. |
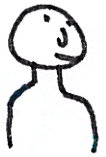 | Neck and shoulders. The rest of body we don’t draw. Based on the eyes, nose and mouth you can see the position of the head (slight rotation of the neck). |
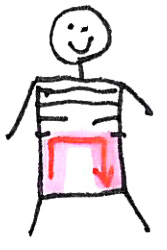
2) Highlight the Massaged Area
Use a highlighter to highlight the massaged area. The standard is pink, but you can use any color you have on hand. If you’re using a pencil, you can apply a slight pressure to shade the area (to make it gray). We continue with our examples:
| The Messaged Area Highlighted | Description |
|---|---|
| Because this is just a relaxation „hold“, we just keep our hands on the client (no movement), nothing is highlighted. |
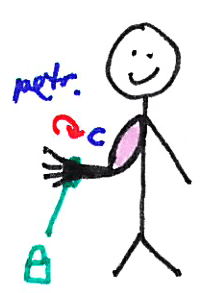
 | Here we massage the arm and forearm. |
 | Achilles tendon. |
 | Fingers (except for the thumb). |
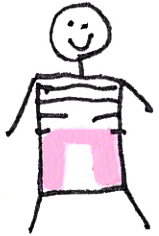 | Some parts of the abdominal region. |
| Passive stretching, nothing is highlighted. |
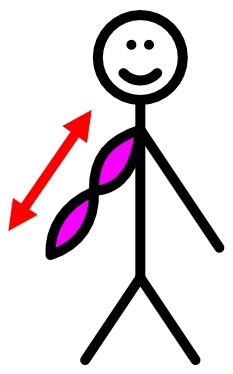
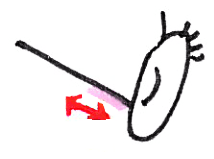
3) Draw the Massage Movement Direction
Standard is the red color because the movement direction is a very important parameter of a massage stroke. We continue with our examples:
| Movement Direction | Description |
|---|---|
| Just holding hands on the client, no movement, no arrow. |
 | Movement proximally and distally. |
 | Movement proximally and distally. |
 | Distal movement, finger by finger. |
 | Clockwise movement in the abdominal region. |
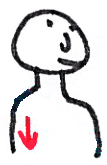 | Passive stretching – downwards (caudal) shoulder movement. |
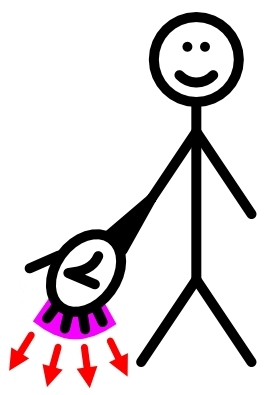
4) Draw the Position of the Hands or Body of the Massage Therapist (Only Where Necessary)
Draw this only if absolutely necessary to make the drawing clear or if you particularly want to point out that the massage therapist is kneeling, standing at a specific place, etc. As a standard, we use green color for this. The green color is also used for trigger points and some other special features. Here are some examples:
| Massage Therapist’s Position | Description |
|---|---|
 | Green color indicates the position of the massage therapist’s hands placed on the client’s back. |
| Standard position of the massage therapist next to the massage table, no need to draw anything. |
| Standard position of the massage therapist next to the massage table, no need to draw anything. |
| Standard position of the massage therapist next to the massage table, no need to draw anything. |
| Standard position of the massage therapist next to the massage table, no need to draw anything. |
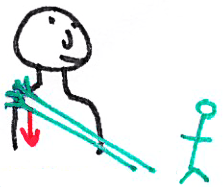 | Green color shows the position of the massage therapist’s hands and his body. We see which side he’s standing at and how he’s holding the shoulder. |
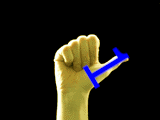
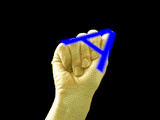
How to draw a trigger point and other special features? Here are some examples:
| Stroke Video | Drawing | Drawing Description |
|---|---|---|
 | 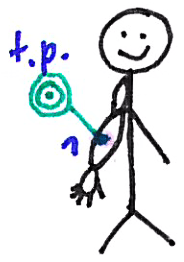 | Trigger point compression (target symbol). |
 |  | Holding of a certain body part (lock symbol). |
| | „Bread breaking„ technique. |
 |  | A kneeling massage therapist. |
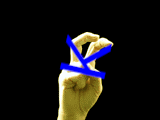
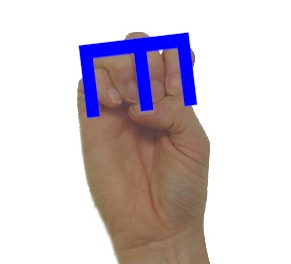
5) Note Down the Massage Therapist’s Hand Shapes And Any Other Notes
First of all, what is this „hand shape“? Imagine a carpenter hammering a nail. What does he use as a tool? A hammer. He holds it in his hand and, with a little exaggeration, you could say that the hammer is an extension of his hand. What is a massage therapist’s „tool“? Although often the therapists do not hold anything in their hand (except for vibration massagers, etc.), they create their „tool“ by forming their hand into a certain shape. (Note: „hand shape“ also often used as „handshape“ is a concept inspired by the sign language linguistics.)
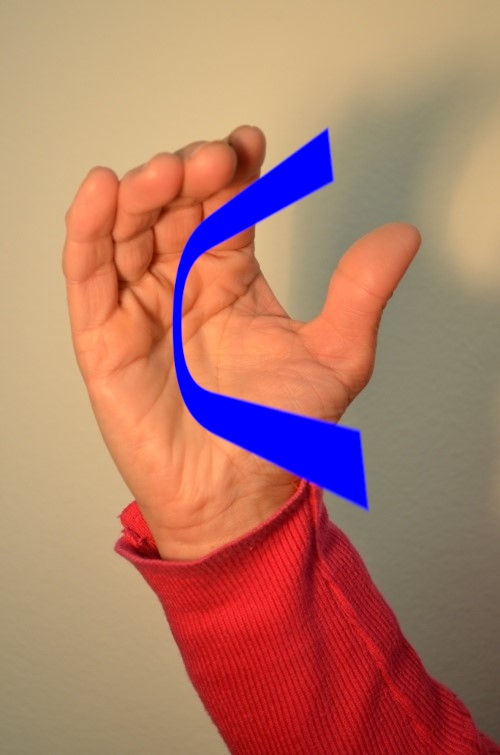
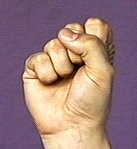
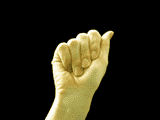
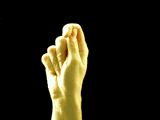
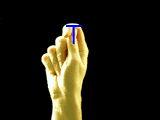
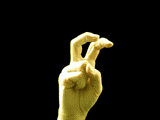
In Tomek’s notation, we distinguish different „hand shapes“ of massage therapist’s hands. If a shape resembles a letter, we note it down very quickly and easily using that letter. The following table gives a basic overview:
| Hand Shape | Mnemonic | Notation | Notes |
|---|---|---|---|
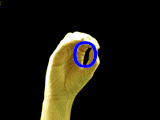
 |  | 1 | Number 1. |
 | 5 | Number 5. | |
 | 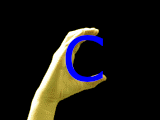 | C | The hand resembles the letter C. The thumb is in opposition (opposite to the fingers). |
 |  | U | The thumb is in reposition (original position). |
 |  | S | The thumb reminds the upper part of the letter S. |
 |  | A | Fingers and thumb resemble a tip, the letter A. |
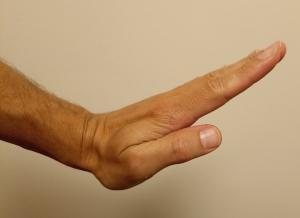 | 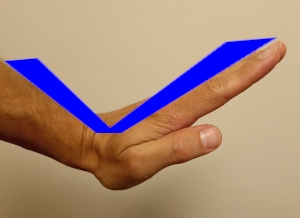 | V | Forearm and palm resemble the letter V. With this handshape shape, we mean that the massage therapist uses thenar/hypothenar (base of the thumb). |
 |  | T | Thumb and index finger resemble the letter T. |
 |  | K | This hand shape looks a bit like the letter K. |
 |  | E | Fingers side by side look like the horizontal lines in the letter E. |
 |  | O | Fingers and thumb in flexion and opposition resemble the letter O. |
If we massage with one hand, we write one letter. If we use both hands, we write two letters side by side. If you massage with one hand and cover your hand with the other hand (for strengthening), you can write the letters on top of each other.
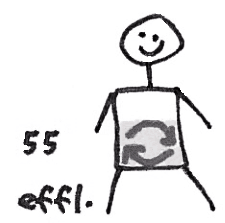
We can also add a massage movement type to the drawing if needed. Just write down a simple abbreviation. Here we see some examples:
| Massage Stroke Type | Abbreviation Examples |
|---|---|
| effleurage, gliding | effl. |
| deep gliding | deep gl. |
| deep gliding, friction | frict. |
| petrissage, kneading | petr. |
| tapotement, percussion | tap. |
| vibration | vibr. |
A few other abbreviations may also be useful (of course, you can create your own as needed, or add a longer note as needed):
| Meaning | Abbreviation |
|---|---|
| alternating left and right hand | L/R |
| mobilization | mob. |
| passive stretching | stretch |
| „eights“ movement | 8 |
| tapotement, percussion |
Here’s a look at our sample 6 massage strokes and how to assign abbreviations to them:
| Abbreviations (blue) | Description |
|---|---|
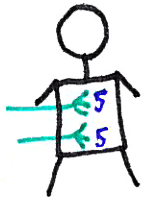 | Both hands of the massage therapist in the „5“ hand shape. |
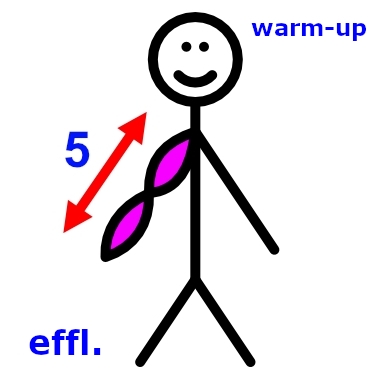 | Massage therapist’s hand shape: 5, type of the stroke: warm-up effleurage. |
 | Massage therapist’s hand shape: C. |
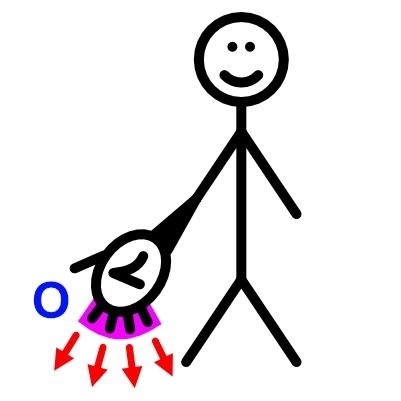 | Massage therapist’s hand shape: O. |
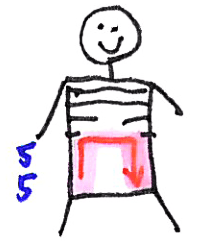 | The massage therapist’s hands one above the other, both „5“ hand shape. |
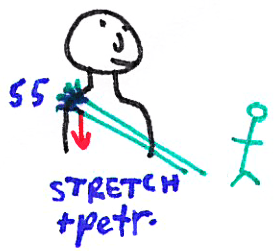 | Both hands of the therapist forming „5“ hand shape. Petrissage + passive stretching. |
And here is the final result:
| Stroke Video | Stroke Drawing |
|---|---|
| |
| |
| |
| |
| |
| |
You may find the procedure a little difficult at first, but don’t worry, after a few attempts and a little practice you will find that you can draw a massage stroke within five seconds and also read it within a second during a practice massage.
The steps to draw a massage stroke can be briefly summarised in these points (only use colors if you have time and have these at hand, otherwise just a pencil/pen/marker will do):
- client’s body black
- massaged area pink
- movement direction red
- massage therapist’s position (if necessary) green
- hand shapes, abbreviations blue
Of course, you don’t have to follow exactly this sequence. Maybe you draw the direction of the massage stroke first and after that you draw the massaged area, or maybe you choose a different sequence, it’s completely up to you. Would you like to see how a complete progression of massage strokes looks like when drawn? And what might a practical „prompt“ look like to help practicing a massage? Take a look here:
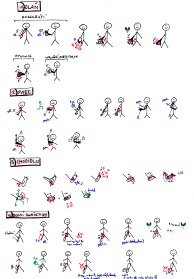
Some of the basic massage strokes drawn. Massage students can draw massage strokes like this and perform first practice massage sessions using these drawings as a „prompt“ or a hint. That can help them to memorize the strokes.
Technical Details (For Scientists)
Some elements of Tomek’s notation are inspired by sign language linguistics and structural linguistics in general, especially Ferdinand Saussure’s synchronic structural analysis of language systems. This innovative perspective brings many new possibilities, such as categorizing massage movements, cataloging them, searching for massage strokes according to certain systematic parameters, creating a „corpus“ of massage movements from massage videos and analyzing them systematically, and many other interesting things. The synthesis of knowledge from linguistics, kinesiology, visual notation systems and visual language as such brings completely new insights into the world of massage.
This notation is not based on SignWriting or other notation systems developed by the dancer Valerie Sutton. On the contrary, it makes a radically different point, because while SignWriting strives for a clear unambiguous and highly detailed notation of movement, massage movements notation aims at the purely practical need for a quick and rough notation that is easy to use in practice. While SignWriting is generally not being used outside of academia, it is hoped that the described system drawing system will be readily adopted by a growing number of massage students.
If you would like to contact the author, you can do so using this e‑mail address or you can comment below.
Czech version of this article: Jak si nakreslit masážní hmaty.
Images, text: ©2022 Fyzous.cz. Massage strokes videos: courtesy of Bodyology School of Massage.

Jak si zapamatovat masážní hmaty
Základní sestava masážních hmatů (Anglie) 5 – břicho [obrázky a videa]

Karta klienta masáže – jak na český SOAP formulář, který vyhovuje GDPR?
O autorovi
Fyzous.cz
Stránka s informacemi z oboru fyzioterapie. Přinášíme informace ze zahraničí, hledáme způsoby jak se neustále vzdělávat, přinášíme recenze zajímavých knih, videí a kurzů. Pomůžeme vám naučit se fyzioterapeutickou angličtinu. Chceme být „research based“, ale zároveň se nebojíme psát o alternativní medicíně.